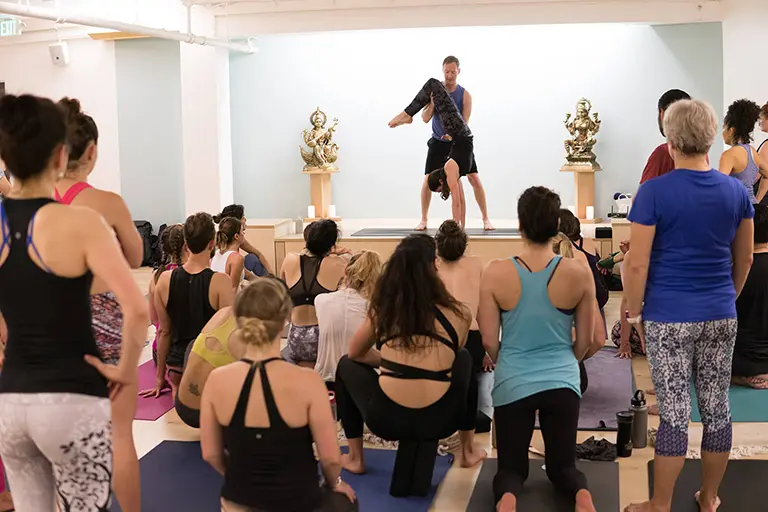
There is nothing better in class than receiving an excellent manual cue (also called manual yoga “adjustments” or “hands-on assists”). The body falls into place and the nervous system relaxes. Unfortunately, the opposite is also true. There’s nothing worse than receiving a poor or inappropriate adjustment—the body strains, the breath tightens, and the nervous system becomes agitated.
A good manual yoga adjustment skillfully communicates the actions of the pose to your body so that your body understands the posture more clearly. A bad adjustment is invasive and misguided. During lousy adjustments, the teacher is either working with a lack of experience and information or an abundance of ego.
That’s why, for the past several years, I’ve been advocating for a paradigm shift: I believe that yoga teachers need to stop acting like stretching machines and exerting leverage on students’ bodies to intensify or “enhance” a stretch.
Why? The answer is simple: This is a mechanically flawed approach to working with bodies and it results in countless avoidable injuries.
I’ve seen plenty of anecdotal evidence of this – and, if you’re a yoga teacher, I’m sure you have, too. During my trainings and workshops I ask students to raise their hand if they’ve been injured during a manual adjustment. There has never been a group where less than forty percent of students have raised their hand. I think you’ll agree that this is too much. As a community, we can drastically lower this number.
A Paradigm Shift for Manual Yoga Adjustments
So what is the paradigm shift I’m talking about here? First, I ask that teachers stop exerting leverage on the part of the student’s body that is moving. Instead, provide increased grounding and stability to the part of the student’s body that is fixed. Let’s take Wide-Legged Seated Forward Bend (Upavistha Konasana) as an example. In this pose, the pelvis and spine rotate forward over the thighbones—they are the “moving” parts of the pose.The thighbones root down into the ground—they are the “fixed” part of the pose. Do not add leverage to the pelvis and spine. Instead, press down on the thighbones. Grounding the student’s thighs will allow the pelvis and spine to release further into the pose without the vulnerability that comes from adding direct pressure onto the pelvis and spine. This is just one of countless examples.
Another component of this paradigm shift is to view manual cues the same way we view verbal cues. Manual cues—like verbal cues—simply communicate the actions of the pose to the student. The idea is to use your hands to communicate directly to the student’s body so he or she has a better understanding of the pose. The idea is not to use your hands to press a student further into the pose. You are not a stretching machine that is doing the pose to the student. (Listen to this Yogaland podcast to hear me talk about this more.)
Here are 10 more ideas for honing your approach to manual yoga adjustments during yoga class:
First, a note about ethics: While this is a huge topic for discussion in a teacher-training program, it’s outside the scope of this article. So, let me just say that teachers should never touch students inappropriately. Period. (To hear my wife, Andrea, talk about ending sexual misconduct in the yoga world, listen to episode 93 of Yogaland.)
1. Observe Before You Adjust
You’ll get pretty busy during class: you’ll be sequencing, verbalizing, adjusting, observing group dynamics, managing the clock, adjusting the tempo, and so on. It can be challenging to simply pause and patiently see a student’s body clearly. Instead, you might notice the most obvious element of a student’s pose and set your sights on giving an adjustment that involves leverage. However, it is important to observe your students before you dive in. This pause will not only help you more accurately assess the room, it will help you become grounded before you attempt to steady someone else.
2. Put Fires Out First
As you assess the room, look for dangerous or uncomfortable postures. Adjust these folks before you walk around and offer a “deepening” adjustment to someone who doesn’t actually need any help. It’s more important that all of your students are working safely than deepening someone’s backbend.
3. Create Steadiness, Not Intensity
Aim to help your students find greater steadiness, ease, and integrity in their postures. Instead of trying to increase range of motion, figure out how you can help them feel more grounded and balanced. Adjustments that increase intensity can be dangerous—especially if the student is not grounded. Unfortunately, many teachers want their students to have “breakthroughs” in their class since these experiences can build an attachment to the teacher. These types of egocentric adjustments often contribute to injuries.
4. Stabilize the Foundation
One of the best ways to adjust your students is by helping them create balanced, stable contact with the floor. If a student’s postural foundation is off, the rest of their body will have to work even harder to maintain equilibrium. Their effort will be inefficiently distributed, creating unnecessary tension throughout the body.
5. Help Them Find their Stride
It is common for students to have a stride that is too long or too short. Helping students size their stride correctly can be one of the most thorough stabilizing adjustments.
6. Know Your Student Before Deepening A Pose
Most students are near their maximum range of motion (at least in the short term) before their teacher adjusts them. This means that your students are already at their edge before you give them any manual cues. Your student is already at a stress point and any additional motion in the posture should be mild. There’s a fine line between deepening the pose and creating an injury. A very fine line.
It’s much safer and more skillful to work with a student that you know well. And, remember our earlier point: You’re not a stretching machine—don’t exert force on the part of the student’s body that is already moving in the posture. Simply use your hands to create more stability and grounding so they can release deeper into the pose on their own.
7. Take Your Time
No one likes a rushed adjustment. Hasty yoga adjustments are unsettling to the mind, body and nervous system. Take your time adjusting your students and surrender to the fact that people aren’t going to get touched 800 times in class. Fewer good adjustments are always preferable to more mediocre adjustments.
8. Observe How Your Students Respond
Sometimes when you adjust a student, you will feel them melt into the new position with comfort and relief. Other times, you will feel the student’s body resist by flinching or tensing. Sometimes a student may not want additional intensity or they’re protecting themselves because they’re nursing an injury. It’s important to observe your student’s breath and physical signals when you give them an adjustment. Sensing and responding to these signals is essential for developing skillful touch.
9. Complement Your Manual Cues with Verbal Cues
In most manual adjustments, you can only guide one or two actions of the posture at a time. To enhance your student’s pose, offer a verbal cue that complements the manual cue. Let’s say you’re adjusting your student in Revolved Triangle by stabilizing their hips while lengthening and rotating their spine in the twist. You can verbally cue them to reach through their back leg and ground their outer foot.
10. Ask the Correct Questions
Don’t ask your students if an adjustment feels good! You won’t always get candid feedback since very few students will feel comfortable telling you that they don’t feel good in the adjustment. Instead, ask your students, “Do you want more intensity, less intensity, or the same intensity?” You don’t have to ask this question every time you make an adjustment. But, if you’re going to ask them if the adjustment is working for them, this is the best way to go about it.


